With the recent release of the open source social site Diaspora, a flock of us from identi.ca have gladly accepted invitations. Most Linux users are more than happy to pilot software at an early stage.
On the initial setup, as a lover of open source, I felt let down by the 'open source equivalent of Facebook.' After confirming email addresses and some basic information, the setup wizard asks if you would like to connect to other sites. To my horror the options are 1) Facebook 2) Twitter 3) must be identi.ca, right? Well that's the problem there's only two options, but never fear fellow denters there is a simple way to overcome this problem.
In the spirit of this blog, I always try to keep everything open source, I'm going to link the accounts using
brdcst.it a free, open source project by Michele Azzolari or
@macno on identi.ca. Whilst brdcst.it is a free service; you need an invite, ask @macno on identi.ca who, for those who don't know him, is very obliging and helpful.
Once you have received your invitation log in to your new account at
brdcst.it We'll do the destination first, trust me it's easier. I'll now break this into steps to make it easier to follow.
Before we can setup brdcst.it properly, we need the feed for your Diaspora posts.
1. On Diaspora, when you are about to make a post, you should see a text box similar to the one shown below:
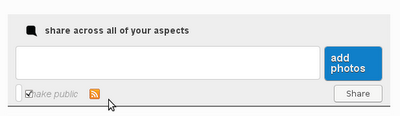
Click on the orange RSS icon.
2. This will take you to a new page showing all your posts, take a note of the address:
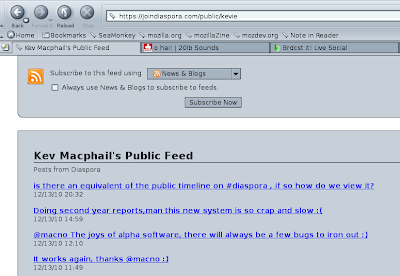
In this example my address is
https://joindiaspora/public/kevie *if there is .atom at the end of the address then leave it off3. Go to the brdcst.it website.
4. On the welcome screen you'll see the number of feeds and destinations you currently have setup. Click on
Add/Edit beside destinations, this will lead you to a new screen.
5. Click on
Add new destination
6. Click on Identica
7. This will take you to identi.ca, log in (if necessary) and the site will display the message:
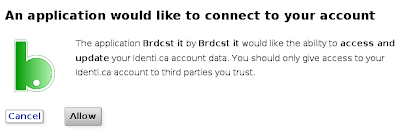
Click on
Allow8. Now go back to brdcst.it, this time click on
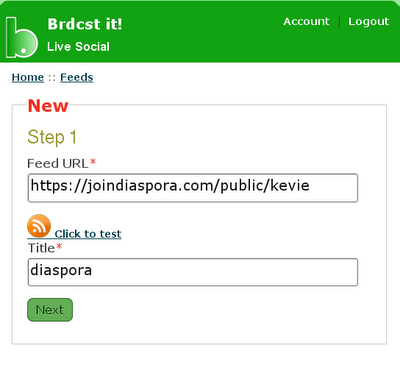
Add/Edit beside feeds
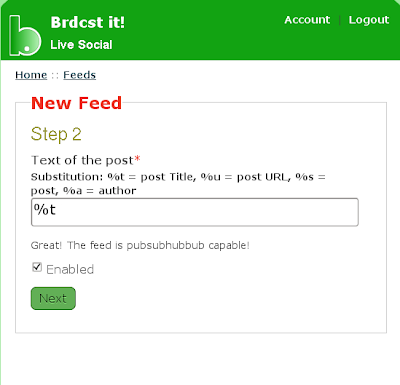
9. In the first box add the address of your Diaspora feed that we noted in step 2. In the second box give this setup a name (I have imaginatively called it 'diaspora')
10. Now it's time to choose what you wish to export, for text only enter %t, if you want a link to be posted then add %u (only needed if your posts exceed the 140 character identi.ca limit)
11. On the next screen, put a tick beside your identi.ca username and click on
Save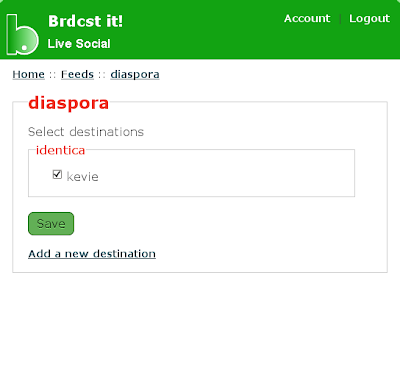
12. Now log out of brdcst.it and your done, your posts from Diaspora will be updated on your identi.ca timeline.
Please note that when you post on Diaspora you must tick the box
make public for it to be posted to identi.ca
With the recent release of the open source social site Diaspora, a flock of us from identi.ca have gladly accepted invitations. Most Linux users are more than happy to pilot software at an early stage.
On the initial setup, as a lover of open source, I felt let down by the 'open source equivalent of Facebook.' After confirming email addresses and some basic information, the setup wizard asks if you would like to connect to other sites. To my horror the options are 1) Facebook 2) Twitter 3) must be identi.ca, right? Well that's the problem there's only two options, but never fear fellow denters there is a simple way to overcome this problem.
In the spirit of this blog, I always try to keep everything open source, I'm going to link the accounts using
brdcst.it a free, open source project by Michele Azzolari or
@macno on identi.ca. Whilst brdcst.it is a free service; you need an invite, ask @macno on identi.ca who, for those who don't know him, is very obliging and helpful.
Once you have received your invitation log in to your new account at
brdcst.it We'll do the destination first, trust me it's easier. I'll now break this into steps to make it easier to follow.
Before we can setup brdcst.it properly, we need the feed for your Diaspora posts.
1. On Diaspora, when you are about to make a post, you should see a text box similar to the one shown below:
Click on the orange RSS icon.
2. This will take you to a new page showing all your posts, take a note of the address:
In this example my address is
https://joindiaspora/public/kevie *if there is .atom at the end of the address then leave it off3. Go to the brdcst.it website.
4. On the welcome screen you'll see the number of feeds and destinations you currently have setup. Click on
Add/Edit beside destinations, this will lead you to a new screen.
5. Click on
Add new destination
6. Click on Identica
7. This will take you to identi.ca, log in (if necessary) and the site will display the message:
Click on
Allow8. Now go back to brdcst.it, this time click on
Add/Edit beside feeds
9. In the first box add the address of your Diaspora feed that we noted in step 2. In the second box give this setup a name (I have imaginatively called it 'diaspora')
10. Now it's time to choose what you wish to export, for text only enter %t, if you want a link to be posted then add %u (only needed if your posts exceed the 140 character identi.ca limit)
11. On the next screen, put a tick beside your identi.ca username and click on
Save12. Now log out of brdcst.it and your done, your posts from Diaspora will be updated on your identi.ca timeline.
Please note that when you post on Diaspora you must tick the box
make public for it to be posted to identi.ca
Exporting Diaspora posts to identi.ca


